A Folk Art Portrait from 1822

Shorts-P_FolkArt-Sophiasburgh_1822

I want to share with you a little research project about this painting that has preoccupied much of my free time in the last few weeks.

Like most transplants to a new community, R and I have developed a fascination with the history of Prince Edward County and our desire to collect material of local significance runs parallel to our efforts to restore the Gorsline house. I’ve kept my eyes open at auctions, yard sales and online channels for anything of PEC-origin from the early 19th century. That said, as a novice collector of Canadiana I’ve also developed a voracious hunger for colonial Georgian furnishings that has me scanning Kijiji, eBay and other virtual auction sites at every conceivable hour.

Most seasoned antique dealers and collectors will tell you that much of Canada’s early material heritage was lost to our American neighbours. The market for American antiques has gone through periods of growth that correspond with celebrations of American independence that predates Canadian nationhood by nearly a century. With good stock within driving distance, U.S. dealers bought up antique goods and furniture from Canada to sell to American collectors for decades if not the last 100 years – and mostly before burgeoning Canadian patriotism around its 1967 centenary kindled a local market interest in Canadiana. Although the persistence of styles in colonial communities were virtually indistinguishable across the border, it is possible to find Canadian objects hidden in collections of Americana if you know what to look for. In most cases provenance is lacking (if not deliberately suppressed) so connoisseurship becomes paramount.

I’m no connoisseur but have lived around R’s east coast furniture long enough to have a good eye. On sleepless nights I’ll usually scroll through online catalogues of American auction sales until I pass out, hoping to find something that piques my interest. I came across the painting above by coincidence in the sale of a single collector in Ohio. I liked the graphic quality of the folk portrait, but was taken aback reading the inscription across the bottom: “Sophiasburgh July 19th 1822 … P. Shorts – Painted.”

Sophiasburgh is one of three original township wards that make up Prince Edward County, Ontario. Along with Marysburgh and Ameliasburgh, the wards were named for the three daughters of George III in 1798. Bearing in mind it is the only location in North America to carry that name, P. Shorts’ portrait is undoubtedly local. I knew I had to pursue it.

The portrait is set in a bedroom. A tester bed with blue ruffled canopy and white bedspread is depicted behind the female subject; a blue window casement projects from the right. The dark-haired young woman wears a white Empire gown with blue ribbons at the waist and cuffs, a ruffled collar and a pearl or white-beaded necklace.

The auction house identified the objects she holds as a scroll and key basket. According to online sources, women in the mid-1800s used key baskets to store their household keys, but these are associated specifically with Virginia and North Carolina, and were traditional wedding gifts from husbands to their new brides – symbolic and utilitarian objects for managing the matrimonial home. American examples were usually made of cow or pig hide, and decorated with symbols of happiness and long life. Whether the custom of key baskets migrated to Canada is speculative, but they appear most frequently in American colonial Germanic communities. It was the period setting that initially caught my attention, but considering the bedroom in relation to the intimacy of the portrait and the significance of the objects the woman holds, it leads me to suspect it commemorates her wedding – most likely to the artist.

Shorts is a relatively rare family name in Prince Edward County, introduced by Pennsylvania-born United Empire Loyalist Augustus Shorts (1777-1869). Augustus was the son of Rosannah Monk (b. 1752) and John E. Shorts (born Schurtz, 1729) who served as a British soldier in the war for American independence. Augustus married Hannah Eleanor Pringle (1776-1862) in 1806 and they settled their family in Fredericksburgh, Lennox & Addington County. The only direct relatives with given names that start with P are both named Philip – one is Augustus’s brother (born about 1775), and the other his son (born about 1800).

With those dates and relationships in mind, P. Shorts is most likely Augustus’s son, who would have been 21 or 22 at the time the portrait was made. He was married to Hannah Brown (1801-1852) from Adolphustown, but unfortunately, I have not been able to trace a marriage record, which could correspond with the date of the portrait.

Apart from partial genealogical records, Phillip Shorts is listed as a constable in the Journal of the House of Assembly of Upper Canada, under the Treasurer’s accounts for the District of Prince Edward, “to be paid” 1 pound, 7 shillings, 6 pennies January 9th, 1837. Philip Shorts also appears in the Lennox & Addington Historical Society’s listings of Upper Canadian deaths: “Shorts, David B. At his father’s residence in Belleville, on 30th ult., David B. Shorts, eldest son of Philip Shorts, formerly of Adolphustown, aged [blank] years. The Transcript, Montreal, 8 November, 1842.” Other sources suggest Philip eventually shortened his last name to Short, which may have curtailed some of my initial searches.

Sadly, there is scant information on Hannah thus far.

I have a few leads yet to follow to flush out more details on the Shorts family, but for now I’m happy to bring Hannah closer to home.

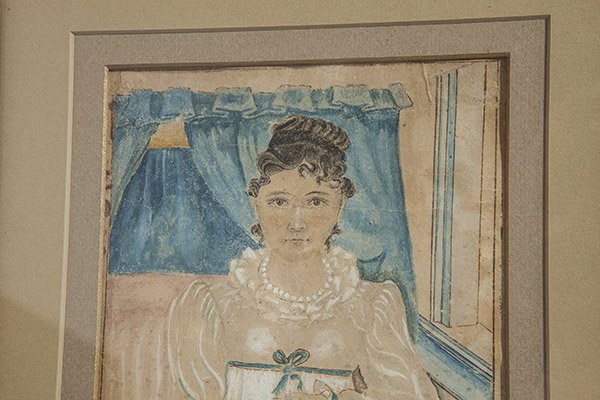
Hannah Shorts detail

A Visit to the Archives

28 Fish Lake Road, PEC - B Napier Simpson Jr. Reference Photographs | Archives of Ontario

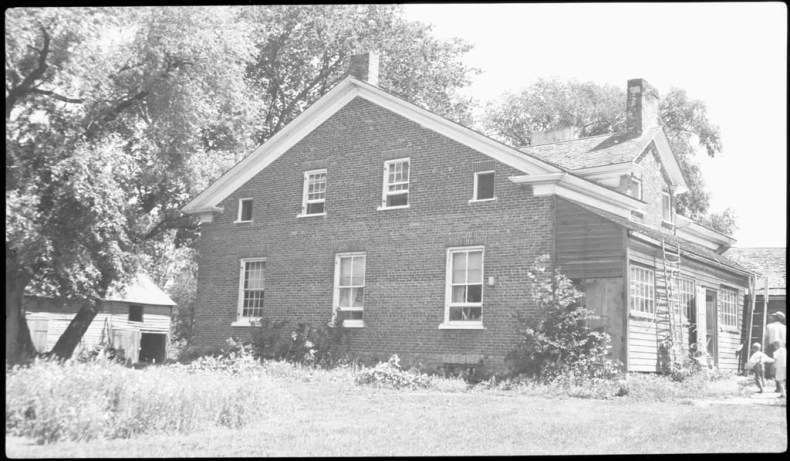
Van Blaricom/Gorsline House, Prince Edward County, c. 1955 – B Napier Simpson Jr. Reference Photographs | Archives of Ontario

Before some business travel in early June, I had made an appointment to view the B Napier Simpson Jr. fonds at the Archives of Ontario. Simpson was an architect who specialized in the design and repair of historic buildings. He documented a number of early structures across southern Ontario in the mid-20th century and maintained generous files of reference photographs (er, negatives), the largest of which is dedicated to Prince Edward County. Images in the file don’t carry individual accession numbers so I had no idea what to expect in opening the file – but I was delighted to find four elevation shots and two detail images of the Van Blaricom/Gorsline house! I put in my order to have the negatives scanned and can now share with you the digital images that just arrived on CD.

For anyone who has had an interest in Prince Edward County architecture, The Settler’s Dream is an indispensable resource. I immediately recognized the image above as the photo used by Tom Cruickshank in his entry for the Van Blaricom/Gorsline house. However, current imagining technology being what it is, the electronic scan makes visible more details than the 1984 print reproduction. The features of the woodshed are clearer and the structure on the front lawn turns out to be a swing set. R has an interest in the clump gardens originally planted around the house; hopefully he’ll be able to identify the species from these photos.

B Napier Simpson Jr. Reference Photographs

South Elevation of the Van Blaricom/Gorsline House, c. 1955 – B Napier Simpson Jr. Reference Photographs | Archives of Ontario

We’ve been contemplating plans to add a structure at the back – R wants a screened-in porch; I want to rebuild the woodshed – and Simpson’s photographs give us a better glimpse at how a build-on will change the look of the house. We’re also keen to make any additions sympathetic to the history of the house, and these images are an excellent reference.

R and I are both skeptical of the age of the porch and whether or not it was part of the original design of the house. All main floor windows originally had shutters (before the days of storm windows and more economical sheet glass), except for the two on the south elevation flanking the kitchen hearth. It could be argued that the kitchen windows were spared the expense of louvered shutters since the back side is far less formal than the other elevations, but I suspect there wasn’t as much need to protect the windows because they looked out over a covered porch. If that’s the case, perhaps the house was always meant to have a back stoop like every good Ontario farmhouse.

What appears in the 1950s photos is clearly a makeshift enclosure on what was intended as an open structure. There are no openings in the house that would accommodate a 15-lite sash, so it’s anyone’s guess where the build-on windows came from. I suspect they were salvaged from somewhere else given their awkward placement in the wall. The exterior door doesn’t match anything in the house either, and I bet it was around this time that the Gorsline family converted one of the windows into a entry from the porch.

B Napier Simpson Jr. Reference Photographs

West Elevation of the Van Blaricom/Gorsline House, c. 1955 – B Napier Simpson Jr. Reference Photographs | Archives of Ontario

There are a number of things I find fascinating about these images:

  • The rotten Craftsman-style windows are much later than we thought;
  • there are at least 11 original windows still extant in the 1950s that have since been replaced;
  • the back build-on is too shallow to have been very useful as an enclosed space;
  • the drive shed across the road was a much more substantial structure than I imagined;
  • most of the shoddy concrete patches and masonry repairs existed at this point in time;
  • and, there were many more mature trees that encroached on the road.

I could lament what’s been lost in these photos, but I’m partly thankful for not being encumbered with trying to salvage appendages to the house that by all accounts were tear-downs long before we arrived on the scene. There’s something refreshing in conceiving of a structure from scratch, and even if we build something to look old, it will benefit from modern engineering. The windows are a sore point though; I doubt I’ll be able to find enough cylinder glass by the time we get around to rebuilding the sashes.

B Napier Simpson Jr. Reference Photographs

North Elevation of the Van Blaricom/Gorsline House, c. 1955 – B Napier Simpson Jr. Reference Photographs | Archives of Ontario

Aside

A Tough Break

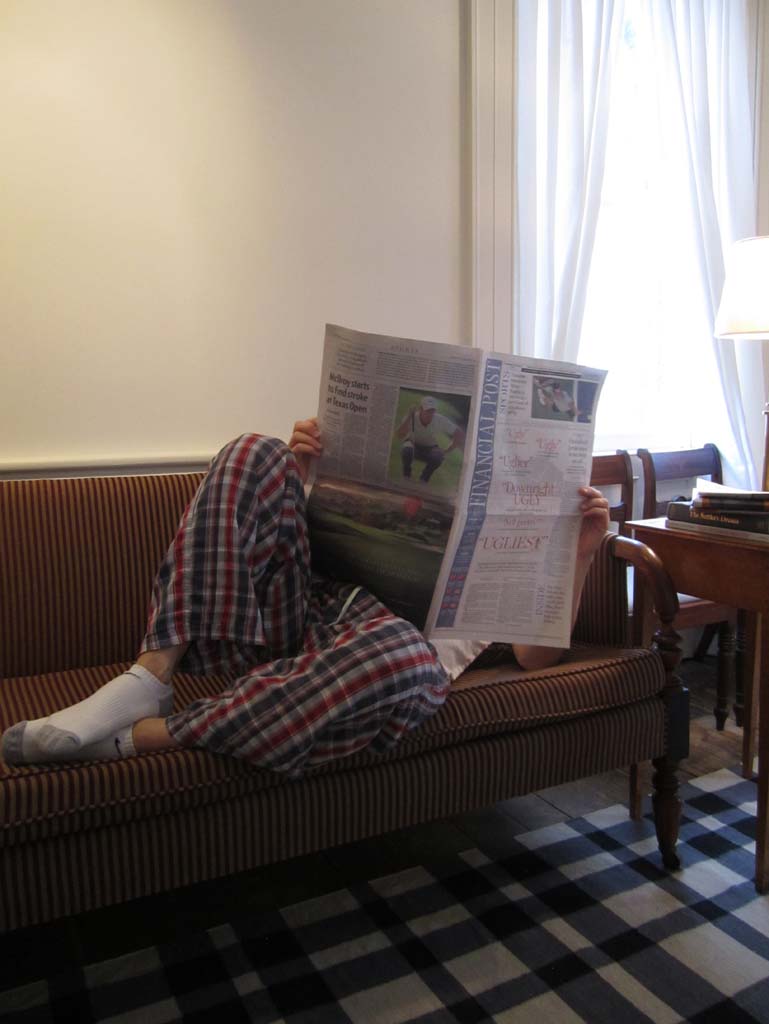
R on the sofa

R on the sofa

It’s been a busy number of months, and although we’ve been at the house almost every weekend since late winter, a dead laptop, stresses at work, and a personal schedule stretched to its limits have prevented me from keeping up with posts here. Frankly, after all the sleepless nights trying to tie up the renovation, R and I just wanted to enjoy the house and I’ve rarely pulled out my camera to document the small visible changes we’ve made along the way.

I could recount to you the endless onslaught of heating issues, plumbing leaks, basement floods, problem contractors, critter invasions, false burglar alarms, and the mounting bills that come along with all of them, but I’m not that kind of complainer. I’d rather look forward and share with you some of the amazing things we’re discovering in country life that keep us coming back to Prince Edward County. So with that, I’m off my break from blogging and hope to get back to writing here with greater frequency.

Strip Tease – Restoring Old Hardware

Tags

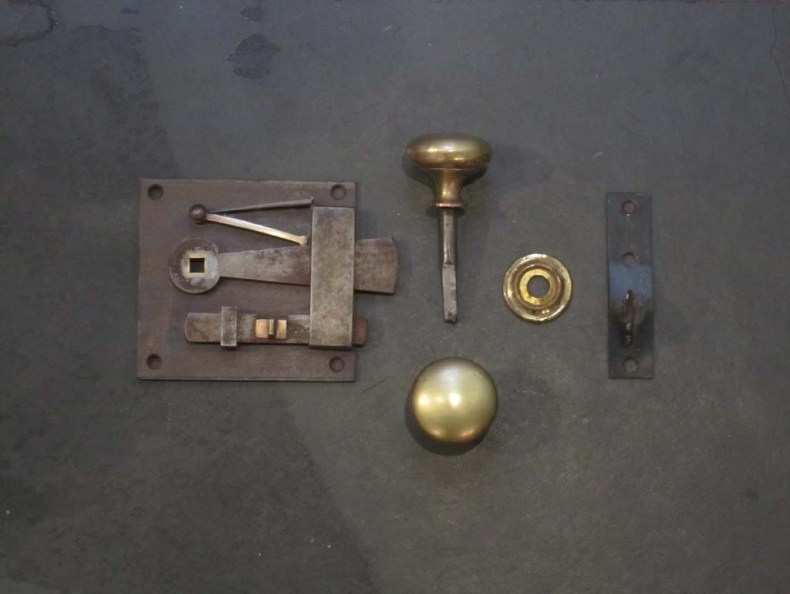
Typical of old door parts, almost all the doorknobs, plate latches and hinges we salvaged from the house had been painted over numerous times. The first challenge in trying to restore them was finding a means of removing the paint that was relatively fast and effective without risking rust or further damage to the hardware. Knowing most the paint used was likely lead-based, I didn’t want to use a heat gun (horrible fumes!), nor did I want the messiness of gel chemical strippers – too many small crevices for a clean strip. After lots of research online, I decided to try a sodium hydroxide bath; something still very caustic but looked to have yielded good results for others who had tried it.

Plate latch parts before stripping

Plate latch parts before stripping

Sodium hydroxide, commonly called lye, is a strong base. While an acid will burn skin and cause pain on contact, a base will painlessly dissolve skin, so it’s possible to suffer a worse burn. Also, sodium hydroxide is not readily diluted with water and is therefore not easy to flush out of your eyes. Needless to say, I was careful to always wear heavy rubber gloves and goggles while handing anything containing or that had been in contact with the lye.

To prepare the lye solution, following some good instructions on glass insulator cleaning, I mixed about 6 ounces of lye crystals (purchased from the plumbing section of the local hardware store) into 1 gallon of cold water in a heavy 2-gallon plastic bucket with tight-fitting lid. Lye’s reaction with water is exothermic (it releases heat) and can release caustic vapours. Because of this, I made sure to mix the lye solution outdoors, adding the lye to cold water very slowly. I let the mixture cool before using it. I also marked the bucket and lid with a Sharpie in case R started poking around it out of curiosity.

One other note of caution:
Do not use aluminum utensils or containers as lye reacts violently with aluminum. Thankfully, I haven’t experienced this first-hand, but am diligent about reading all warnings before starting a project!

After a day in the bath, the paint and other accretions came off the hardware easily. Latex paints crinkled up like alligator skin; older lead paint sloughed off in tiny particles. However, I also left some steel latch plates in the solution for a few days by mistake (I’m easily distracted) without issue. I dipped the hardware in pure white vinegar to neutralize the base, and could easily remove softened paint deposits with an old toothbrush or wood skewer. That said, vinegar removes the tarnish from brass and copper, and I found some of the doorknobs to become hazy – as if they were lightly etched. After a careful rinse in hot, soapy water, I quickly dried all the parts and rubbed them down with linseed oil to inhibit rust. Needless to say, I was so cautious to concentrate on the materials I was handling, I didn’t take photos of the process.

Plate latch parts after lye stripping

Plate latch parts after lye stripping

I found that the lye bath darkened significantly, largely due to the rust deposits on the hardware, but was as effective on the 20th dip as it was on the first. The bottom of the bucket now contains a sludge of old paint. Because it contains lead, it should be treated as hazardous waste. When I’m done with it, I will neutralize the solution by adding 2 cups of pure vinegar then delivering it to dump for appropriate disposal.

Now, I just wish I had more stuff to strip!

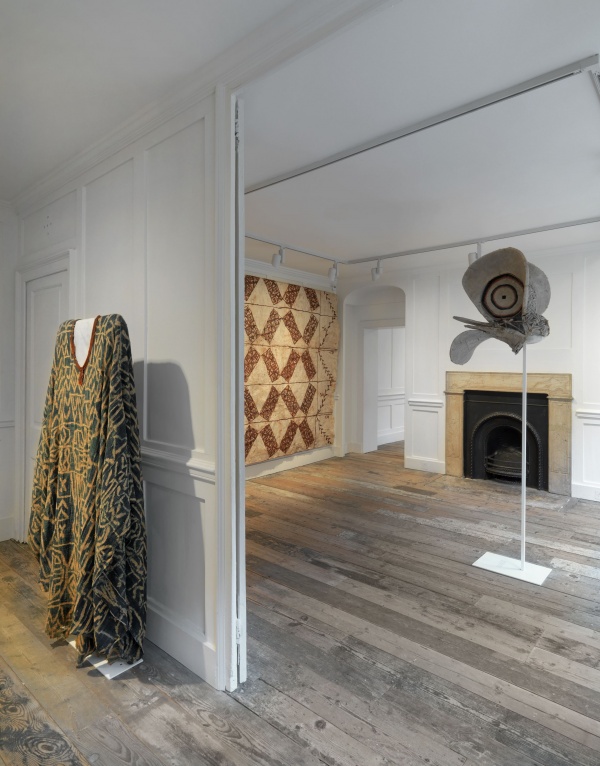
Inspiration – Raven Row, Spitalfields, London

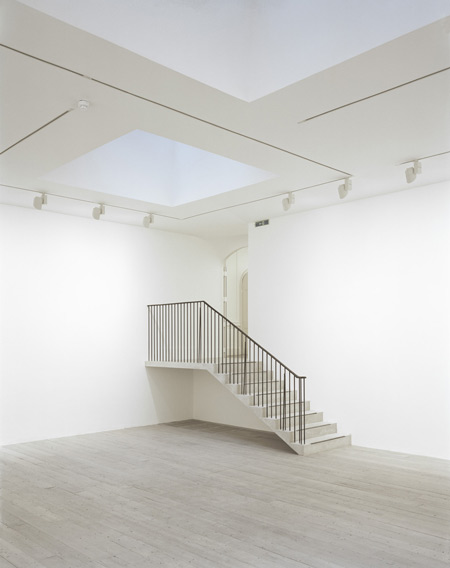
Raven Row, Gallery 9 | Photo: David Grandorge

Raven Row, Gallery 9 | Photo: David Grandorge

In my matrix of personal interests, contemporary art and Georgian architecture are strongest – but I’m hard-pressed to find overlaps between the two. That’s why I’m intrigued when ‘unconventional’ places are used for the presentation of contemporary art, particularly when those spaces are historic and especially when those spaces aren’t initially designed for the presentation of art. Empty white rooms are loaded spaces, and although there are tomes written on the codification of museum and gallery spaces, domestic space also carries specific cues as to how you are supposed to view and interact with the stuff within it.

Raven Row, 56 & 58 Artillery Lane, Spitalfields, London

Raven Row, 56 & 58 Artillery Lane, Spitalfields, London

02_RavenRow_LondonCollection-BishopsgateLibrary

Raven Row | London Collection, Bishopsgate Library

Raven Row is a not-for-profit contemporary art space located in a structure dating from 1754 in Spitalfields, London. The building comprises 56 and 58 Artillery Lane whose site has served many functions including a weapons practice ground and a hospital, with the current edifice first constructed as a Huguenot retail outlet and later used as working-class residences. The restoration of the historic rooms, renovation of an adjoining office tower and the addition of two modern exhibition spaces are the vision of Raven Row‘s founding director Alex Sainsbury, heir to the British supermarket chain that bears the family name.

Raven Row, Gallery 8 | Photo: David Grandorge

Raven Row, Gallery 8 | Photo: David Grandorge

Raven Row, Gallery 5 | Photo: David Grandorge

Raven Row, Gallery 5 | Photo: David Grandorge

Raven Row, Gallery 10 | Photo: David Grandorge

Raven Row, Gallery 10 | Photo: David Grandorge

Sainsbury engaged 6a architects to redesign and oversee construction of the new complex which includes two former mercers’ houses and a concrete-framed office building containing gallery spaces, offices, two residential apartments and studio space. With a focus on creating spaces with maximum potential for future uses, 6a architects chose finishes and materials that were evocative of Raven Row‘s history without being heavy-handed.

Raven Row, Gallery 2 | Photo: David Grandorge

Raven Row, Gallery 2 | Photo: David Grandorge

Raven Row, Gallery 6B | Photo: David Grandorge

Raven Row, Gallery 6B | Photo: David Grandorge

Charred timber was used to clad courtyard rooflights in homage to a fire that ravaged the building in 1972. Charred timber also formed the moulds for a new cast iron façade on Frying Pan Alley, replacing ornate Regency cast iron railings that were stolen from the original façade in the 1960s. A new white concrete cantilevered stair connects the oldest and newest spaces, fitted with a raw sand-cast bronze balustrade.

10_RavenRow_56ArtilleryLane-LondonMetropolitanArchives

Residence at 56 Artillery Lane | London Metropolitan Archives

Interior of 56 Artillery Lane following the 1972 fire | London Metropolitan Archives

Fire damage at 56 Artillery Lane, 1972 | London Metropolitan Archives

Raven Row, Courtyard behind 56 Artillery Lane

Raven Row, Courtyard behind 56 Artillery Lane

What I appreciate most about Raven Row is the decision to retain the historic woodwork and plaster without forcing the art and objects that go into its spaces to be subservient to it. While I’m sure this still presents some awkward relationships, I find the conversation new objects can have with old environments interesting. I’m a firm believer in Canadian urban writer and activist Jane Jacobs’s maxim “Old ideas can sometimes use new buildings. New ideas must use old buildings.” It’s encouraging to observe some sympathy for historic interior decoration in a space dedicated to cutting-edge ideas

Asier Mendizabal, Hard Edge #5 & #6 (2010) | Raven Row

Asier Mendizabal, Hard Edge #5 & #6 (2010) | Raven Row

Artist Placement Group (2012) | Raven Row

Artist Placement Group (2012) | Raven Row

The Stuff That Matters (2012) | Raven Row

The Stuff That Matters (2012) | Raven Row

We’re done! But not done, done…

Living Room (Week 38) | Gorsline House

Living Room (Week 38) | Gorsline House

Our holiday rush was not like that of our friends. Our focus on completing the renovation was to prepare for a final evaluation to close the project contract.

You can’t mortgage a house without a kitchen, or without a bathroom, or without some form of heating, so finding a way to finance the renovation/restoration of the Gorsline House as a historic shell was a major hurdle we faced before the project even began. A purchase-plus-improvement loan wasn’t going to cut it (given the scale of work) and a new build loan wasn’t a good fit because we weren’t building from scratch. All things being negotiable, the local branch of a major bank offered us a construction loan that would cover the initial purchase and renovation, to be drawn at preset thresholds, which we could convert to a conventional mortgage when job was done. Given the high rate of interest we’ve been paying on the progressive draws compounded by the delay to finish the project, we’re eager to satisfy the bank’s valuation (part of the agreement) and take advantage of historically low mortgage rates.

I don’t want to bore you with the nitty gritty, so let me show you some of the finishing touches we accomplished during the winter break…

Pickled Steel Hearth Plate (Week 38) | Gorsline House

Pickled Steel Hearth Plate (Week 38) | Gorsline House

We both agree the concrete patch in front of the hearth is ghastly; not only can’t you add anything to it that will be level with the floor, but KA left the edges of the pine flooring around it uneven before pouring the slab. I had a 1/8″ plate of hot-rolled steel cut to size and gave it a pickled treatment. We wanted it black but paint would have scraped off and “Parkerizing” acid treatments would have killed us. Someone recommended repeated applications of CLR, which ultimately gave the steel plate a mellow (though somewhat spotty) patina.

R's new rug in the west parlour (Week 38) | Gorsline House

R’s new rug in the west parlour (Week 38) | Gorsline House

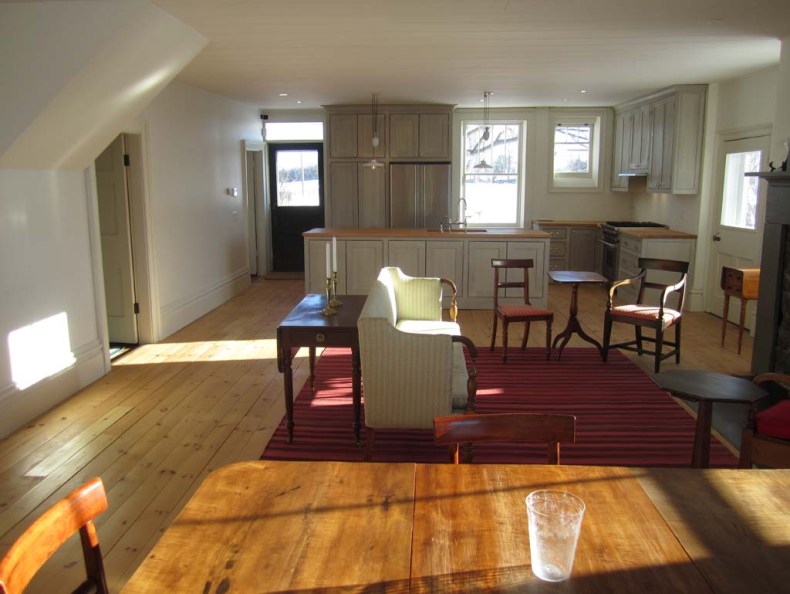
Between the furniture we brought back from R’s mom’s place and some select chairs from home, we set up a few rooms that made the house feel more like home. The living room and kitchen needed something in the space to help delineate how we planned to use it. The remainder largely went into R’s west parlour – with energized check rug.
West Parlour (Week 38) | Gorsline House

West Parlour (Week 38) | Gorsline House

I doubted how this expanse of blue and ivory would look – something between an over-sized blanket and a tartan field – but admit it looks really good in context. The contrast with lighter woods helps.

East Parlour (Week 38) | Gorsline House

East Parlour (Week 38) | Gorsline House

By contrast, my room looks desperate for some furniture. In due time.

Second Floor Hall (Week 38) | Gorsline House

Second Floor Hall (Week 38) | Gorsline House

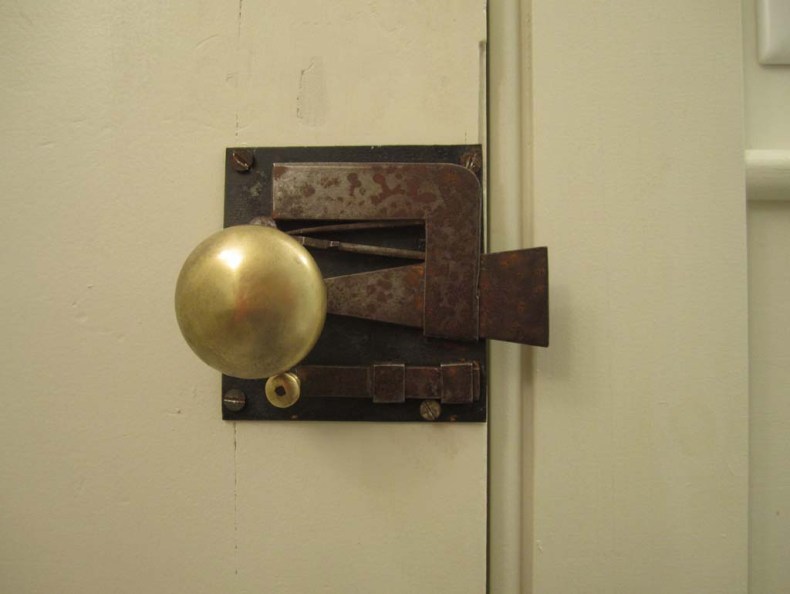
in a house with few distinguishing details, things like the brass knobs in the upstairs hallway make a difference. Because each plate latch is hand forged and each knob fit to the specific thickness of the door, these took hours of careful measurements, drilling, carving and prodding to work properly. The few spindles that didn’t fit I had redrilled at The Door Store in Toronto.

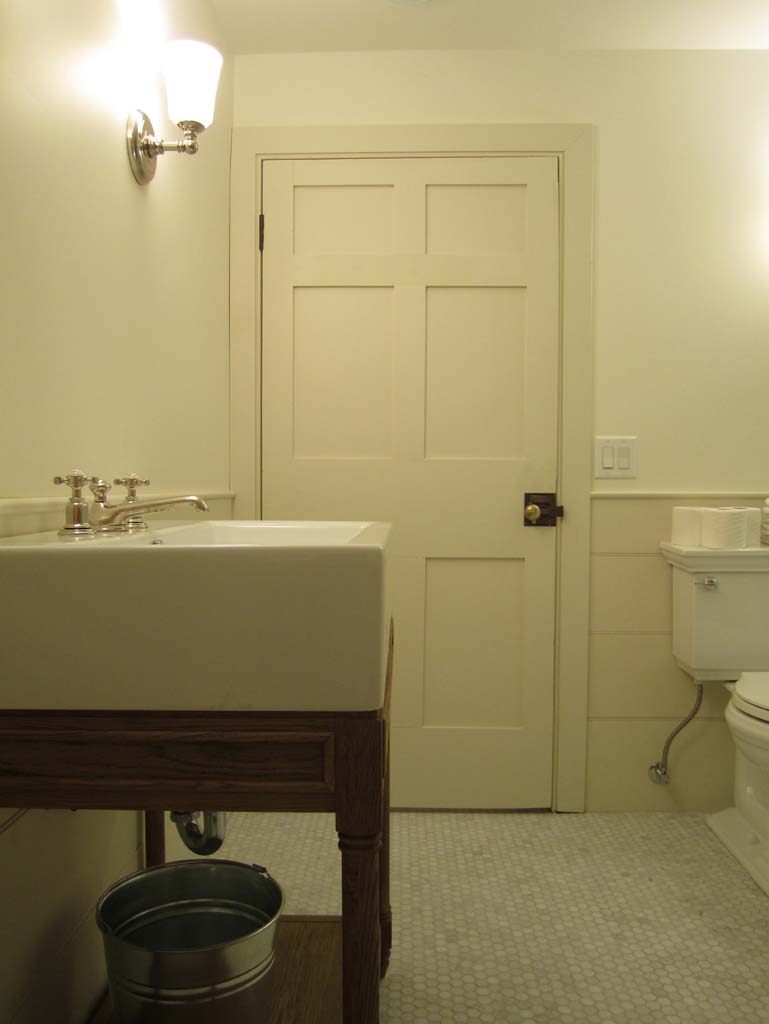
Main Bathroom (Week 38) | Gorsline House

Main Bathroom (Week 38) | Gorsline House

Ensuite Bathroom (Week 38) | Gorsline House

Ensuite Bathroom (Week 38) | Gorsline House

We haven’t found the right mirrors yet but the bathrooms are looking good. Thanks to R, they’ve had their first thorough clean since the fixtures were installed.

Master Bedroom (Week 38) | Gorsline House

Master Bedroom (Week 38) | Gorsline House

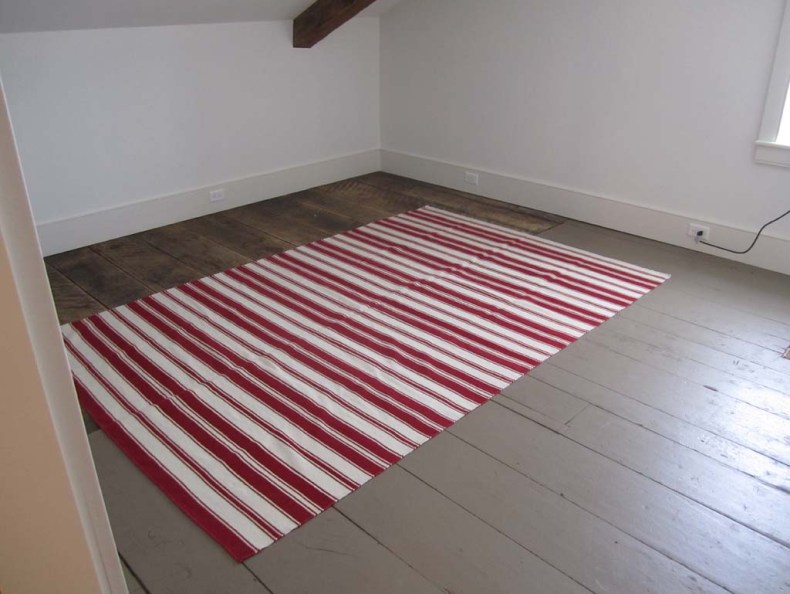
Disguising the guest room floor (Week 38) | Gorsline House

Disguising the guest room floor (Week 38) | Gorsline House

I can’t bring myself to paint the attic floor just yet, so a strategically placed rug helped to hide my indecision.

Salvaged Plate Latch | Gorsline House

Salvaged Plate Latch | Gorsline House

Most of the plate latches would have had matching keepers-on-plate to secure the lock, but the new beaded door casings aren’t the right proportions to receive the screws to hold them in place. I used simple drive keepers (like the ones we’ve found in the salvaged moldings) for the single latches. I’ll need to order some custom arrow-shaped keepers for those latches with privacy bolts – especially for the bathrooms.

Stair Hall (Week 38) | Gorsline House

Stair Hall (Week 38) | Gorsline House

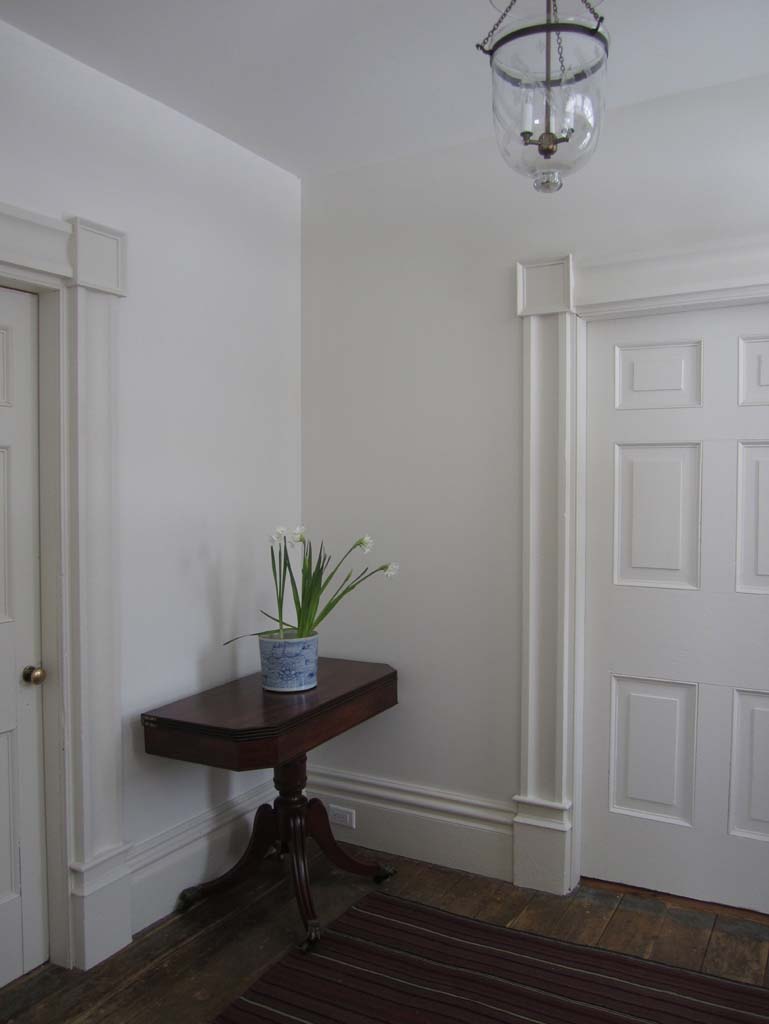
Entry Hall (Week 38) | Gorsline House

Entry Hall (Week 38) | Gorsline House

Looking across the Living Room (Week 38) | Gorsline House

Looking across the Living Room (Week 38) | Gorsline House

Renovation – Weeks 34 to 37 (Nearing the Finish Line)

IMG_2855

Gorsline House (Week 37)

You’ll have to excuse my tardiness in posting – it’s been a whirlwind end to 2012. We managed to visit the house only twice over the holiday break amidst pressures at work and visits with family. However, we managed to get lots done in those few days albeit with a focus on finishing details. The deep snow that covers Prince Edward County is a stark contrast to the relatively balmy winter of last year. Thankfully the heat is working… partially.

We’re waiting (impatiently) for a part to fix the heat compressor in the attic; in the meantime, the hydronic radiant heating under the main floor is carrying the brunt of environmental control in the house. We’re burning through propane like its going out of style – mainly because KA didn’t tell us the hydronic system required insulation to push the heat up through the wood floor. The frogs and snake have found respite in our rain forest-like soup of a basement while R and I have been donning extra layers to fend off the chill. Now that KA has installed the polyisocyanurate panels (try saying that three times fast), we’re closer to a comfortable level of heat in the house

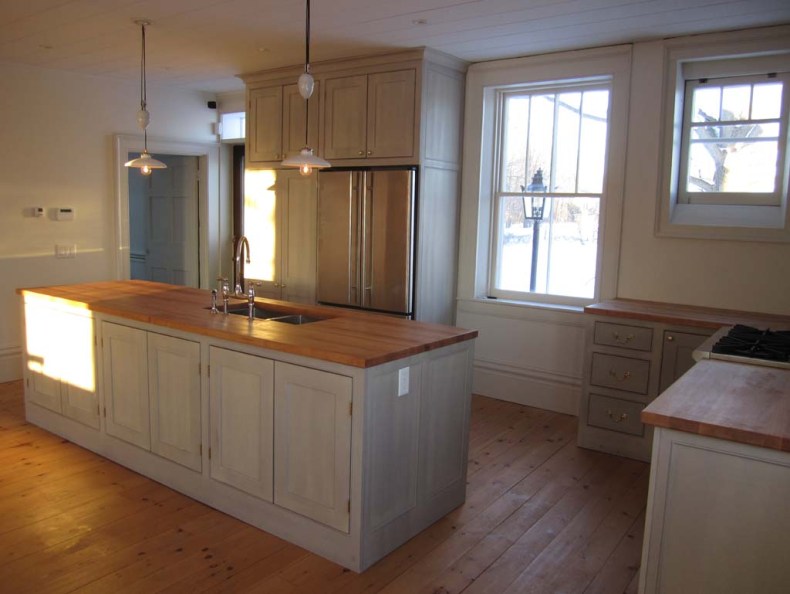
Completed Kitchen (Week 34) | Gorsline House

Completed Kitchen (Week 34) | Gorsline House

Since my last posting, KA and his crew helped put the finishing touches on the kitchen – including hauling the fridge from the drive shed and placing it in its alcove. It’s an inch-and-a-half shy of the 72″ enclosure, which I don’t mind. However, we’ll have to see if we can hide more of the black enameled body by pushing it farther back into the opening.

Completed Kitchen (Week 34) | Gorsline House

Completed Kitchen (Week 34) | Gorsline House

KL made some adjustments to the drawer fridge without compromising the design of the island facing. The ventilation grill at the base looks to have one-too-many holes cut into it, but nothing that can’t be fixed. We’ve ordered gray plugs and plates for the ends of the island, so the white ones you see are just temporary.

Completed Kitchen (Week 34) | Gorsline House

Completed Kitchen (Week 34) | Gorsline House

We opted not to use hardware on the island cabinets that face into the room – they have magnetic pop latches instead, allowing the extra storage to have a slightly more streamlined look. I plan to strip the clear lacquer from the brass knobs and pulls (if I ever find the time) to let them tarnish naturally. Since the brass doorknobs throughout the house have a nice patina, it would be nice to remove that gloss of newness from the kitchen to help it blend in.

Hanging the Hall Light Fixture (Week 35) | Gorsline House

Hanging the Hall Light Fixture (Week 35) | Gorsline House

KA set up a platform in the stairwell for me to install the hurricane light in the hall. It’s a second-hand reproduction, but falls in line with the heritage look we’re trying to cultivate throughout the house. I’m not a fan of the floral patterns the star cuts in the glass throw against the wall, but beggars can’t be choosers.

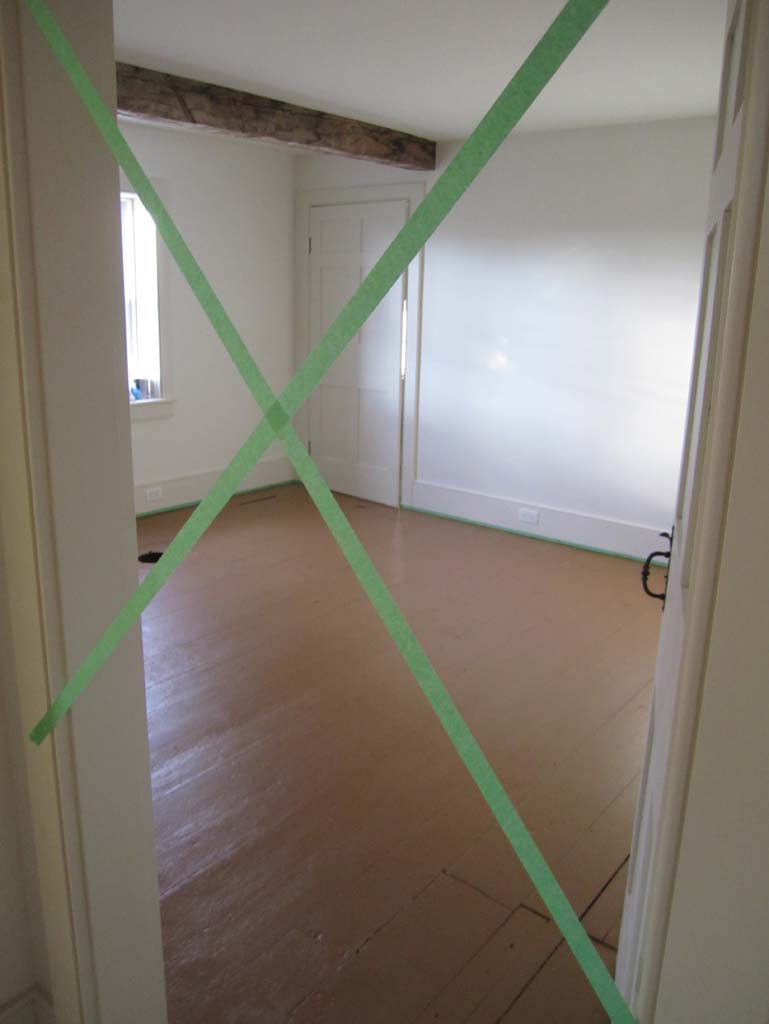
Painting the 'Pumpkin' Room Floor (Week 35) | Gorsline House

Painting the ‘Pumpkin’ Room Floor (Week 35) | Gorsline House

After the headache of using alkyd floor paint in the guest bedroom that had an oil-painted floor, I was eager to find any alternative that would allow me to avoid using it again. Many calls to Benjamin Moore, visits to our local paint store, and disagreements with R on the right colour, I removed all the alkyd I could with a palm-sander and repainted the floor with a latex enamel. This simple after shot does not do justice to the mess and exhaustion the whole process took.

Final Coat on the Yellow Bedroom Floor (Week 35) | Gorsline House

Final Coat on the Yellow Bedroom Floor (Week 35) | Gorsline House

On a similar note, we added a final coat to the yellow floor of the adjoining bedroom. A third of the floor here was also covered in the blue-gray oil paint, and the latex enamel adhered to it without issue. The Benjamin Moore experts and the guys at Nettleship’s  Paint & Hardware both recommended heavy scuffing/sanding of the old paint, and allowing the new paint at least a week to harden before a scratch test – worked like a charm!

Post-Holiday Packing in New Brunswick

Post-Holiday Packing in New Brunswick

Family obligations being what they are, we drove from Prince Edward County to Fredericton over two days to visit R’s mother. R won’t admit to using mom’s house as inexpensive storage, but the decision to drive a full 14 hours in a Canadian winter across three provinces was largely due to the treasure trove of east coast antiques he has stashed a her place that would be much better served in our age-appropriate house. We managed to cram much more into the rented minivan that either of us anticipated.

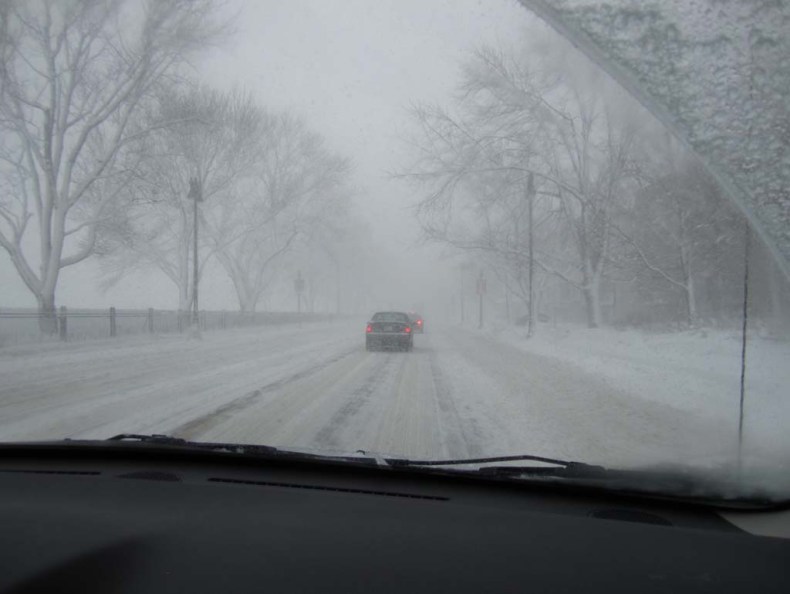
Winter Driving Conditions near Quebec City

Winter Driving Conditions near Quebec City

But then imagine hauling a ton and a half of ancient birch and mahogany across unploughed stretches of remote highway. I don’t drive – but the pleather armrests in that vehicle will forever bear the marks of my white knuckles during that trip.

R cross-country skiing, New Year's Day (Week 37) | Gorsline House

R cross-country skiing, New Year’s Day (Week 37) | Gorsline House

We made it back to the house (thanks to R’s superb winter-driving skills) but were so exhausted from the time away, we threw our productivity to the wind. I was supposed to focus on installing door latches while R cleaned every nook and cranny in the house, but the call of freshly fallen show and sunshine was too strong to ignore inside. We brought our cross-country skis from Fredericton and enjoyed a leisurely trail out to the back corners of the property.

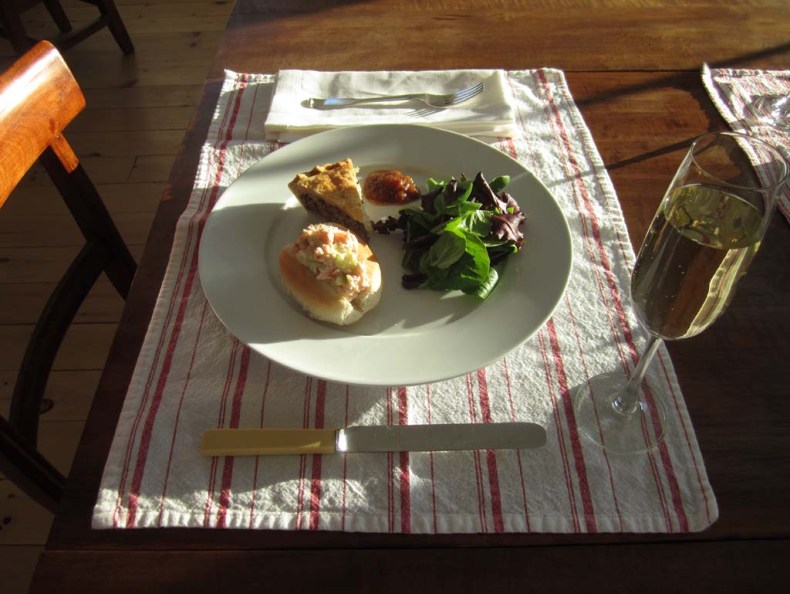
New Year's Libations (Week 37) | Gorsline House

New Year’s Libations (Week 37) | Gorsline House

I think we were so fed up with being around each other 24-hours a day for two weeks straight that neither of us was in any mood to celebrate the New Year at midnight. A long night’s sleep and fresh air made for a much happier brunch with bubbles, lobster rolls and tourtière New Year’s day.

We’re rushing to the finish line in order to call in a final bank valuation, in the midst of which I haven’t had my camera at the ready. Some shots of the fruits of our labour are sure to follow though.

Renovation – Week 33

Tags

, , , , , ,

West Elevation (Week 33) | Gorsline House

Some small respite from the cold weather of late, so don’t let the green grass fool you. It’s been just warm enough to melt the blanket of snow on the ground and the lawns still look lush in the temporary thaw. The best parts of the photograph above are the new storm windows – hopefully they’ll help retain some heat that the leaky old windows can’t.

North elevation storm window (Week 33) | Gorsline House

The original shutters have had to compete with the new storms; their hinges impinge on the opening that the storms for the front of the house had to be narrowed to fit the span. There are spacer bars running up the vertical edges to take up the gap forced by the shutter hinges. Something to keep in mind if/when we ever get around to reproducing the shutters for the sides and back windows. Although the storms aren’t an exact match to the two originals we found in the drive shed, JG did an excellent job of keeping the muntins as thin as possible to sympathize with the old windows.

Kitchen Mantle Before (Week 33) | Gorsline House

Inside, KL has installed the bead detail to the fireplace mantle so I could finally get around to painting it. Although the Gloucester Sage green wasn’t my favourite choice for a bathroom floor colour, it was drawn from the earliest paint we could find on the fire surround, so I was happy to use it here.

Kitchen Mantle After (Week 33) | Gorsline House

I had gotten so used to seeing the mottled surface of the wood that the stark flatness of the fresh paint was a bit… underwhelming. R was thrilled that the new colour shows off its colonial design, but I’m not set on the green. That said, it’s only paint and a very easy fix. If you’ve noticed the difference in size of the supporting vertical boards, it’s because there was originally an inset cabinet around the left-hand side of the chimney, owing to the fireplace opening being slightly off-centre.

Painted Mantle Detail (Week 33) | Gorsline House

I like that the crackle texture of the older paint layers still shows through. I just wish the wood filler patches didn’t absorb the paint differently and create an inconsistent surface. The shelf is also a later piece of oak but the magic of paint lies in how it marries the old and new together quite well.

Spring Latch Replacement (Week 33) | Gorsline House

I continued with replacement of some of the door hardware. We have only one spring latch that matches up to an original door on the main floor – I can only assume these were the first to break under heavy use. The replacements were sourced from antique dealers and architectural salvage shops, and though they may have come from anywhere in Upper Canada or the North East United States, they’re a close match to the originals we have on hand. As each latch is hand forged, no two are identical and each requires specific holes to be drilled in the door to line up with the knob spindle and screws.

Parlour Rug Option Two (Week 33) | Gorsline House

Elte’s sale was too good to pass up, but we were tipped off to check out their outlet store before buying through their showroom. We were glad we did as we snagged three striped rugs to try out on the main floor.

All three rugs are flat woven wool Dhurries. We thought the soft stripe might be a nice counterpoint to the formality of our furniture, but there’s something about the colour gradation and varied stripe widths that doesn’t quite hit the mark we were aiming for. However, they’ll do for now and I’m happy to have something soft underfoot, even if this place is still a construction site.

Hallway Rug Option One (Week 33) | Gorsline House

Renovation – Week 32

New rise-and-fall lights (Week 32) | Gorsline House

Wouldn’t you know it – I left the camera recharger in the city this weekend. I could only grab what I thought were five photos before the battery died, but it turns out the camera only capture two!

No progress on the kitchen but I managed to hang two rise-and-fall lights purchased from Legacy. Even with half the doors missing and no hardware, I feel the lights help pull the space that much closer to the finish line. The weights are filled with steel pellets that perfectly counterbalance the weight of the bulb and shade so they stay at the height you lift the lights to. That said, they’re porcelain and very difficult to keep steady while installing if the counterbalancing elements aren’t attached.

R’s new chevron rug (Week 32) | Gorsline House

We also hit up Elte’s winter warehouse sale and snagged a flat woven rug. I think the colours are appropriate to the age of the house, but the chevron pattern isn’t an easy pattern to roll out of a 19th-century hand loom. R is in love with it, and even though it’s too small for the parlour floor, we’ll likely use it upstairs in a bedroom.

Whatever rooms in the early 1800s weren’t lucky enough to get a painted floor cloth would likely have had handwoven rugs, often striped patterns which were easy to create on a loom. If the loom weren’t wide enough for a single run, woven strips would be sewn together to achieve an overall pattern large enough to cover the desired floor.

Not much else to report just yet. Stay tuned.

Renovation – Week 31 (Half Cooked in the Kitchen)

Tags

, , , , , , , , ,

New cabinet doors (Week 31) | Gorsline House

You’ll have to forgive me for a slightly delayed post this week. Too few changes around the house, then suddenly things appear to swing towards progress again.

We arrived at the house late this weekend, but were surprised with the kitchen cabinets partially installed. After all the fretting over the colour of the milk paint, I’m not liking the finish it achieves when waxed. It has the look of an aged patina but it’s a stark contrast to the flat painted surfaces around the rest of the room. The colour is close to what R and I were expect although it has a distinctive blue-green hue and not the warm gray we were aiming for.

New kitchen cabinets (Week 31) | Gorsline House

Some minor construction details are a bit irksome too, but nothing unforgivable. The face frames have a butt-joint to the side panels with an obvious vertical seam (though there’s no easy way to cover or conceal it). I didn’t want recessed end panels with a bead detail or face frames as thin as the cabinet surrounds, but KL took it upon himself to make the “upgrade” (not to my design specs, but you can’t fault someone for giving you that little bit extra). There’s also the awkward panel edge to the fridge enclosure and crown molding that sits at a very odd angle (but that’s what you get with sloping ceilings).

Drawer fridge enclosure (Week 31) | Gorsline House

Even though I gave KA all the installation manuals and spec sheets for the appliances we planned to order along with my kitchen plan sketches, I reminded him each time the topic came up to cross check the measurements. Lo, something was missed on the only fully built-in appliance of the lot – the drawer fridge.

You may notice the kick plate covers the lower drawer by over an inch-and-a-half. This isn’t entirely un-fixable, but definitely frustrating given the actual appliance has been sitting in the house for nearly 3 months only to have an ill-fitting home in what is supposed to be a fully custom kitchen. However, with the clearances and counter heights as set parameters, there’s little wiggle room for the fridge between the two-inch face frame at the top and the six-inch kick plate at the bottom. One or the other will have to give.

Replaced mantlepiece molding (Week 31) | Gorsline House

We determined the missing piece of molding on the mantlepiece was the same profile as the cove that appears under the exterior eaves, so we asked KA to use it as the kitchen cabinet crown as well to help cut down on custom milling costs. It looks appropriate now that it’s in place, but we may want to run a bead detail along the bottom to help cover the 1/4″ that the molding doesn’t quite cover.

The woodcarving elves have paid us a visit (Week 31) | Gorsline House

R and I were certainly not happy when we rounded the corner to head upstairs – the corners of the newel post have been carved down to graceful little lobes. This may seem like the smallest trifle, but after being so careful to preserve the sharp square corners of the new post where it joins the salvaged original that we know had an identical square base, this is a big disappointment. When I pointed out our frustration to KA, he mentioned he had asked KL to finish painting the stair risers and to take a “light touch with sandpaper” to the newel; a well-intentioned Google search gave KL the idea to carve the corners down to look like they had been lathe-turned. Ugh.
It’s frustrating when people take such liberties in your home.

Sampling the kitchen hardware (Week 31) | Gorsline House

There wasn’t much time to accomplish any tasks in a single-night stopover, so R and I dug out some of the kitchen handles and knobs to make sure they were a good fit. They’re lacquered brass which I would like to strip and let tarnish over time. I just don’t have the bandwidth for it at the moment.
For the time being, I’m trying to focus on door knobs… first latch up!

Reconditioned rim latch (Week 31) | Gorsline House